SwiftUI Navigation
Normally I'd spend a little while sipping coffee thinking of some clever title for this, but i'll just get right to it - SwiftUI navigation is finally here, and its so good im dropping UIKit from my indie app. No more crazy extensions that break every update, no more hacks, just really clean framework code.
The basics
NavigationView is gone 🤯
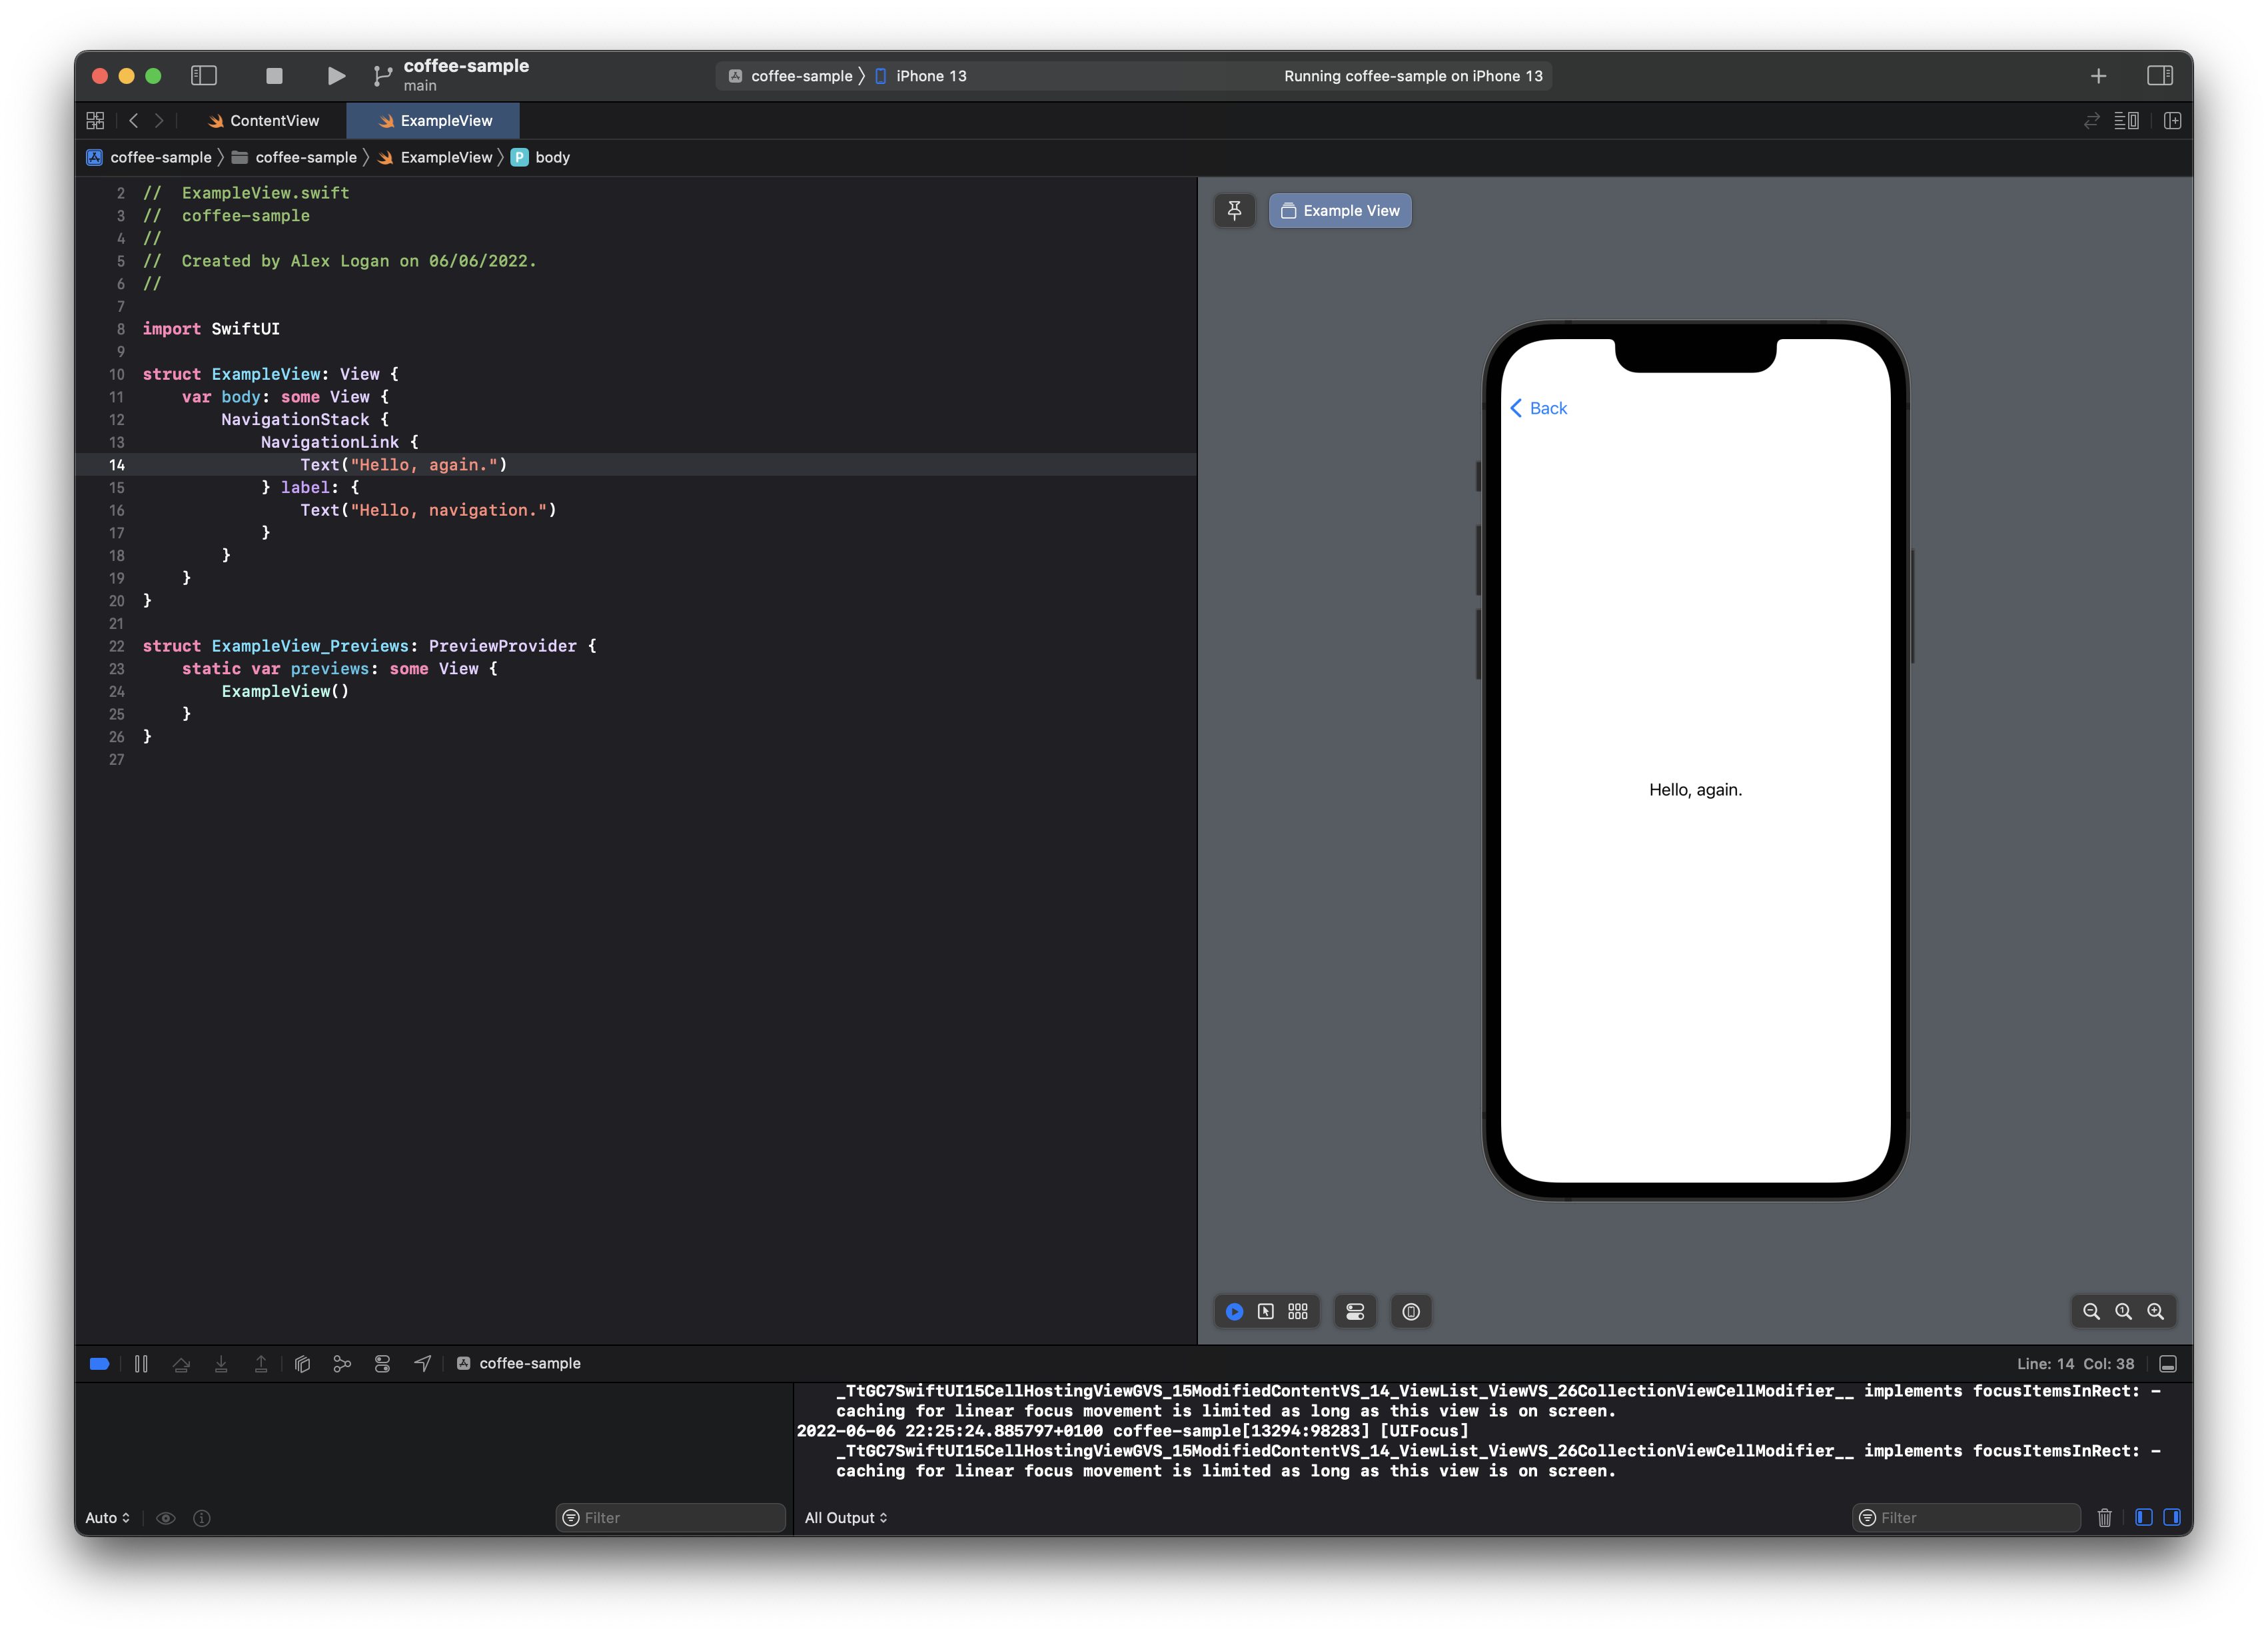
No really. Navigation has been replaced by NavigationStack, which has a couple of special abilities we'll meet shortly. The simplest way to use NavigationStack is just about a drop in replacement for NavigationView.
All your NavigationLinks will work exactly as you'd expect.
struct ExampleView: View {
    var body: some View {
        NavigationStack {
            NavigationLink {
                Text("Hello, again.")
            } label: {
                Text("Hello, navigation.")
            }
        }
    }
}
struct ExampleView: View {
var body: some View {
NavigationStack {
NavigationLink {
Text("Hello, again.")
} label: {
Text("Hello, navigation.")
}
}
}
}
Lets modernise and swap out our NavigationLink for something a little better shall we?
There's two brand new things we'll need.
First is actually still a NavigationLink, just with a slightly different signature. NavigationLink(value:destination:) is a brand new way to navigate using models, rather than having to construct views in place.
I've wrapped the code in a list here so its a little prettier. This is entirely extra.
struct ExampleView: View {
    var body: some View {
        NavigationStack {
            List {
                NavigationLink(value: Emoji(moji: "🗽"), label: {
                    Text("Start spreading the news")
                })
            }
        }
    }
}
struct ExampleView: View {
var body: some View {
NavigationStack {
List {
NavigationLink(value: Emoji(moji: "🗽"), label: {
Text("Start spreading the news")
})
}
}
}
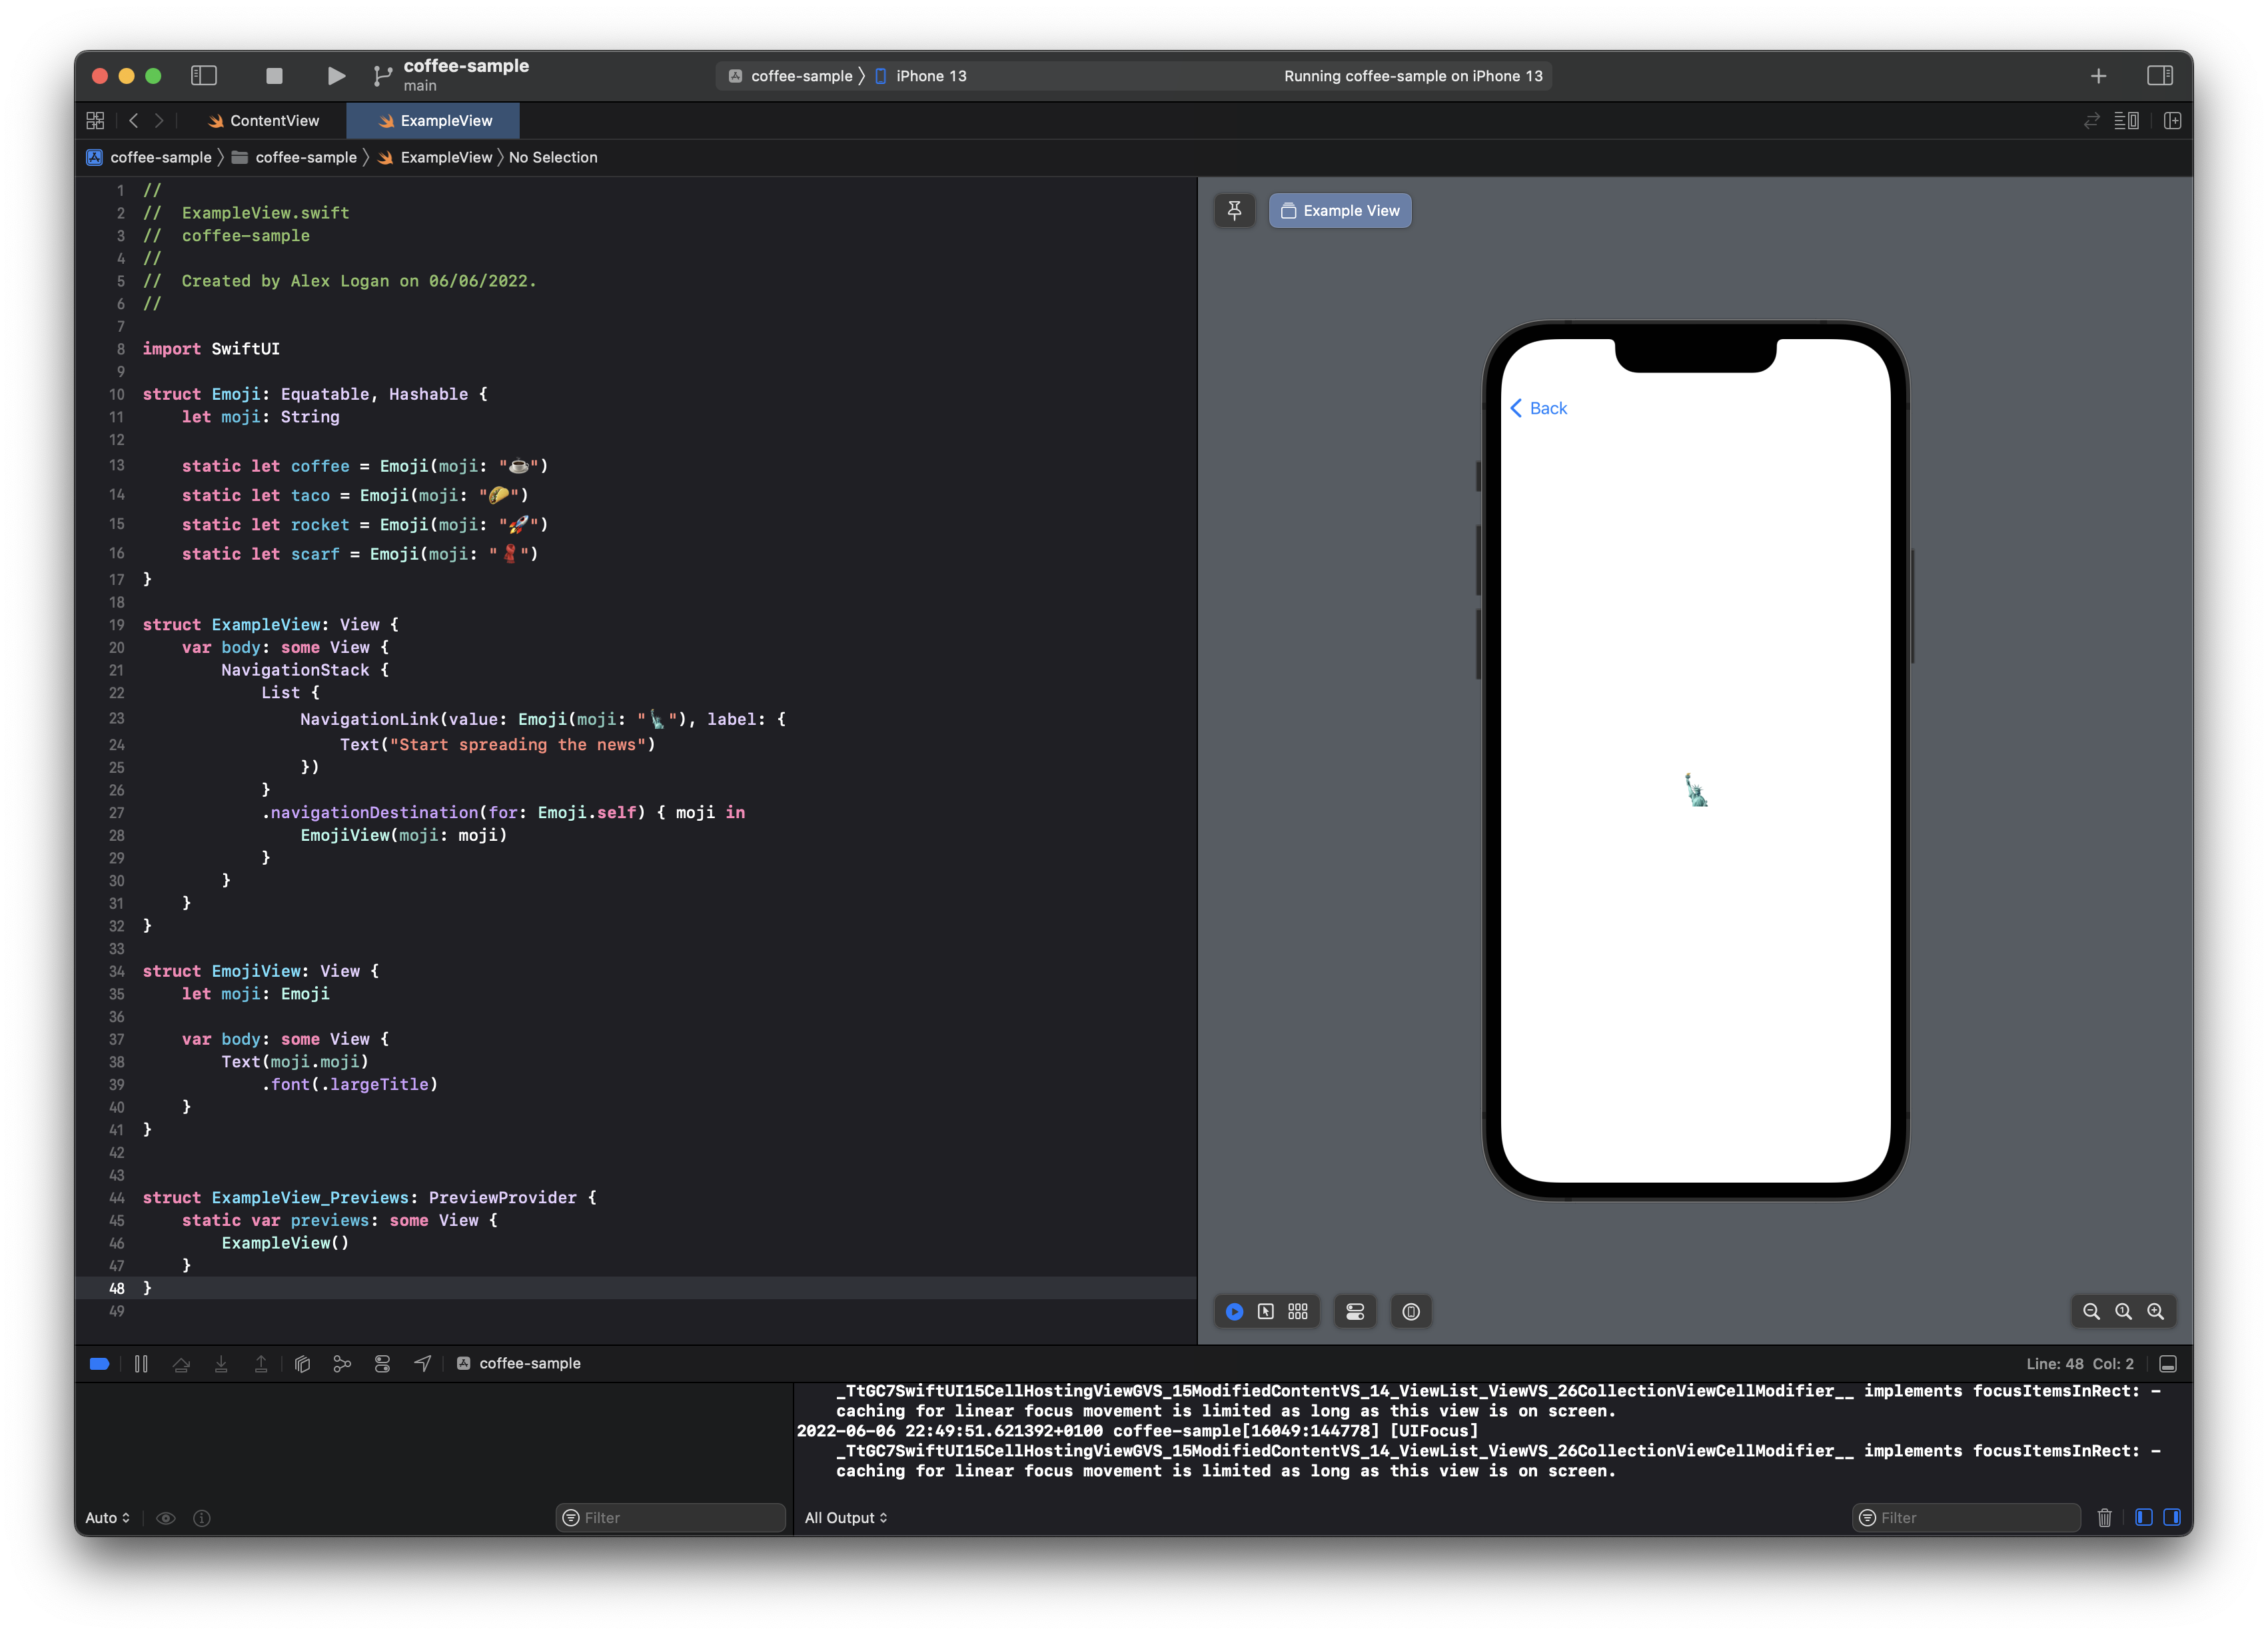
}The second is .navigationDestination(for:destination:) which lets us tell SwiftUI what to do with our new navigation link.
struct ExampleView: View {
    var body: some View {
        NavigationStack {
            List {
                NavigationLink(value: Emoji(moji: "🗽"), label: {
                    Text("Start spreading the news")
                })
            }
            .navigationDestination(for: Emoji.self) { moji in
                EmojiView(moji: moji)
            }
        }
    }
}
struct ExampleView: View {
var body: some View {
NavigationStack {
List {
NavigationLink(value: Emoji(moji: "🗽"), label: {
Text("Start spreading the news")
})
}
.navigationDestination(for: Emoji.self) { moji in
EmojiView(moji: moji)
}
}
}
}When we tap our navigation link, we get our emoji view, all nicely controlled by our top level code.

Now, whenever any view inside our hierachy provides an Emoji to a NavigationLink it'll pass it up to our navigationDestination here.
Using multiple routes
In most apps you'll have more than one route, so lets look at handling that. Unsurprisingly, its nice and easy, we just repeat ourselves.
We can keep adding these navigation destinations, which allows for us to manage our entire navigation stack where we needed it. For example, you might have your top level stack that pushes important screens, and they each manage their own seperate navigation stacks.
struct ExampleView: View {
    @State var mojis = [Emoji.coffee, Emoji.taco, Emoji.rocket, Emoji.scarf]
    @State var coffees = [Coffee(name: "Cortado"), Coffee(name: "Flat White")]

    var body: some View {
        NavigationStack {
            List {
                Section(header: Text("Best emoji"))  {
                    ForEach(mojis, id: \.moji) { moji in
                        NavigationLink(value: moji, label: {
                            Text(moji.moji)
                        })
                    }
                }
                Section(header: Text("Coffee"))  {
                    ForEach(coffees, id: \.name) { coffee in
                        NavigationLink(value: coffee, label: {
                            Text(coffee.name)
                        })
                    }
                }
            }
            .navigationDestination(for: Emoji.self) { moji in
                EmojiView(moji: moji)
            }
            .navigationDestination(for: Coffee.self, destination: { coffee in
                CoffeeView(onSelectReset: { }, coffee: coffee, otherCoffees: coffees)
            })
            .navigationTitle(Text("Moji"))
        }
    }
}
struct ExampleView: View {
@State var mojis = [Emoji.coffee, Emoji.taco, Emoji.rocket, Emoji.scarf]
@State var coffees = [Coffee(name: "Cortado"), Coffee(name: "Flat White")]
var body: some View {
NavigationStack {
List {
Section(header: Text("Best emoji")) {
ForEach(mojis, id: \.moji) { moji in
NavigationLink(value: moji, label: {
Text(moji.moji)
})
}
}
Section(header: Text("Coffee")) {
ForEach(coffees, id: \.name) { coffee in
NavigationLink(value: coffee, label: {
Text(coffee.name)
})
}
}
}
.navigationDestination(for: Emoji.self) { moji in
EmojiView(moji: moji)
}
.navigationDestination(for: Coffee.self, destination: { coffee in
CoffeeView(onSelectReset: { }, coffee: coffee, otherCoffees: coffees)
})
.navigationTitle(Text("Moji"))
}
}
}Inside CoffeeView we actually have a seperate set of navigation links, which can function simply without actually having any knowledge of all the work we've done above. This should make routing nice and clean.
struct CoffeeView: View {
    var onSelectReset: () -> ()
    let coffee: Coffee
    let otherCoffees: [Coffee]

    var body: some View {
        List {
            Text(coffee.name)
                .font(.subheadline.weight(.medium))

            Button(action: {
                onSelectReset()
            }, label: {
                Text("Reset")
            })

            Section(header: Text("Other Coffee")) {
                ForEach(otherCoffees, id: \.name) { coffee in
                    NavigationLink(value: coffee, label: {
                        Text(coffee.name)
                            .font(.subheadline.weight(.medium))
                    })
                }
            }
        }
        .navigationTitle(Text(coffee.name))
    }
}
struct CoffeeView: View {
var onSelectReset: () -> ()
let coffee: Coffee
let otherCoffees: [Coffee]
var body: some View {
List {
Text(coffee.name)
.font(.subheadline.weight(.medium))
Button(action: {
onSelectReset()
}, label: {
Text("Reset")
})
Section(header: Text("Other Coffee")) {
ForEach(otherCoffees, id: \.name) { coffee in
NavigationLink(value: coffee, label: {
Text(coffee.name)
.font(.subheadline.weight(.medium))
})
}
}
}
.navigationTitle(Text(coffee.name))
}
}Programatically managing the stack
So far we've pushed things, but what about that big scary question - how do we reset the stack?
It's trivial now.
First, lets add a reference to NavigationPath. This is the object that allows a lot of our new tools to work, and it serves as our entry point for programatic control outside of the ususal constraints.
@State private var path = NavigationPath()@State private var path = NavigationPath()Next, we should pass this to our NavigationStack so it can populate it.
    NavigationStack(path: $path) {
        ...
} NavigationStack(path: $path) {
...
}There's quite a few methods available on the path, so lets go through them one by one.
The simplest of them all is that it exposes the count of items inside count, which we can read to let us track how deep the stack goes.
struct ContentView: View {
    @State private var path = NavigationPath()
    @State private var coffees = [ Coffee(name: "Flat White"), Coffee(name: "Cortado"), Coffee(name: "Mocha") ]

    var body: some View {
        NavigationStack(path: $path) {
            List {
                Text("Select a coffee to get started.")
                    .font(.subheadline.weight(.semibold))
                ForEach(coffees, id: \.name) { coffee in
                    NavigationLink(value: coffee, label: {
                        Text(coffee.name)
                            .font(.subheadline.weight(.medium))
                    })
                }
            }
            .navigationDestination(for: Coffee.self, destination: { coffee in
                CoffeeView(onSelectReset: { }, coffee: coffee, otherCoffees: coffees)
            })
            .navigationTitle(Text("Select your brew"))
        }
        .onChange(of: path.count, perform: { newCount in
            print(newCount)
        })
    }
}
struct ContentView: View {
@State private var path = NavigationPath()
@State private var coffees = [ Coffee(name: "Flat White"), Coffee(name: "Cortado"), Coffee(name: "Mocha") ]
var body: some View {
NavigationStack(path: $path) {
List {
Text("Select a coffee to get started.")
.font(.subheadline.weight(.semibold))
ForEach(coffees, id: \.name) { coffee in
NavigationLink(value: coffee, label: {
Text(coffee.name)
.font(.subheadline.weight(.medium))
})
}
}
.navigationDestination(for: Coffee.self, destination: { coffee in
CoffeeView(onSelectReset: { }, coffee: coffee, otherCoffees: coffees)
})
.navigationTitle(Text("Select your brew"))
}
.onChange(of: path.count, perform: { newCount in
print(newCount)
})
}
}Next, we can pop items from the stack manually, using path.removeLast(Int). When combined with path.removeLast(path.count) we have a brand new mechanism to pop to the root of any given stack.
Here i've created a popToRoot method that I pass to CoffeeView to allow it to have a reset button that pops us right back to the stack. This method could be called from anywhere.
struct ContentView: View {
    @State private var path = NavigationPath()
    @State private var coffees = [ Coffee(name: "Flat White"), Coffee(name: "Cortado"), Coffee(name: "Mocha") ]

    var body: some View {
        NavigationStack(path: $path) {
            List {
                Text("Select a coffee to get started.")
                    .font(.subheadline.weight(.semibold))
                ForEach(coffees, id: \.name) { coffee in
                    NavigationLink(value: coffee, label: {
                        Text(coffee.name)
                            .font(.subheadline.weight(.medium))
                    })
                }
            }
            .navigationDestination(for: Coffee.self, destination: { coffee in
                CoffeeView(onSelectReset: { popToRoot() }, coffee: coffee, otherCoffees: coffees)
            })
            .navigationTitle(Text("Select your brew"))
        }
    }

    func popToRoot() {
        path.removeLast(path.count)
    }
}
struct ContentView: View {
@State private var path = NavigationPath()
@State private var coffees = [ Coffee(name: "Flat White"), Coffee(name: "Cortado"), Coffee(name: "Mocha") ]
var body: some View {
NavigationStack(path: $path) {
List {
Text("Select a coffee to get started.")
.font(.subheadline.weight(.semibold))
ForEach(coffees, id: \.name) { coffee in
NavigationLink(value: coffee, label: {
Text(coffee.name)
.font(.subheadline.weight(.medium))
})
}
}
.navigationDestination(for: Coffee.self, destination: { coffee in
CoffeeView(onSelectReset: { popToRoot() }, coffee: coffee, otherCoffees: coffees)
})
.navigationTitle(Text("Select your brew"))
}
}
func popToRoot() {
path.removeLast(path.count)
}
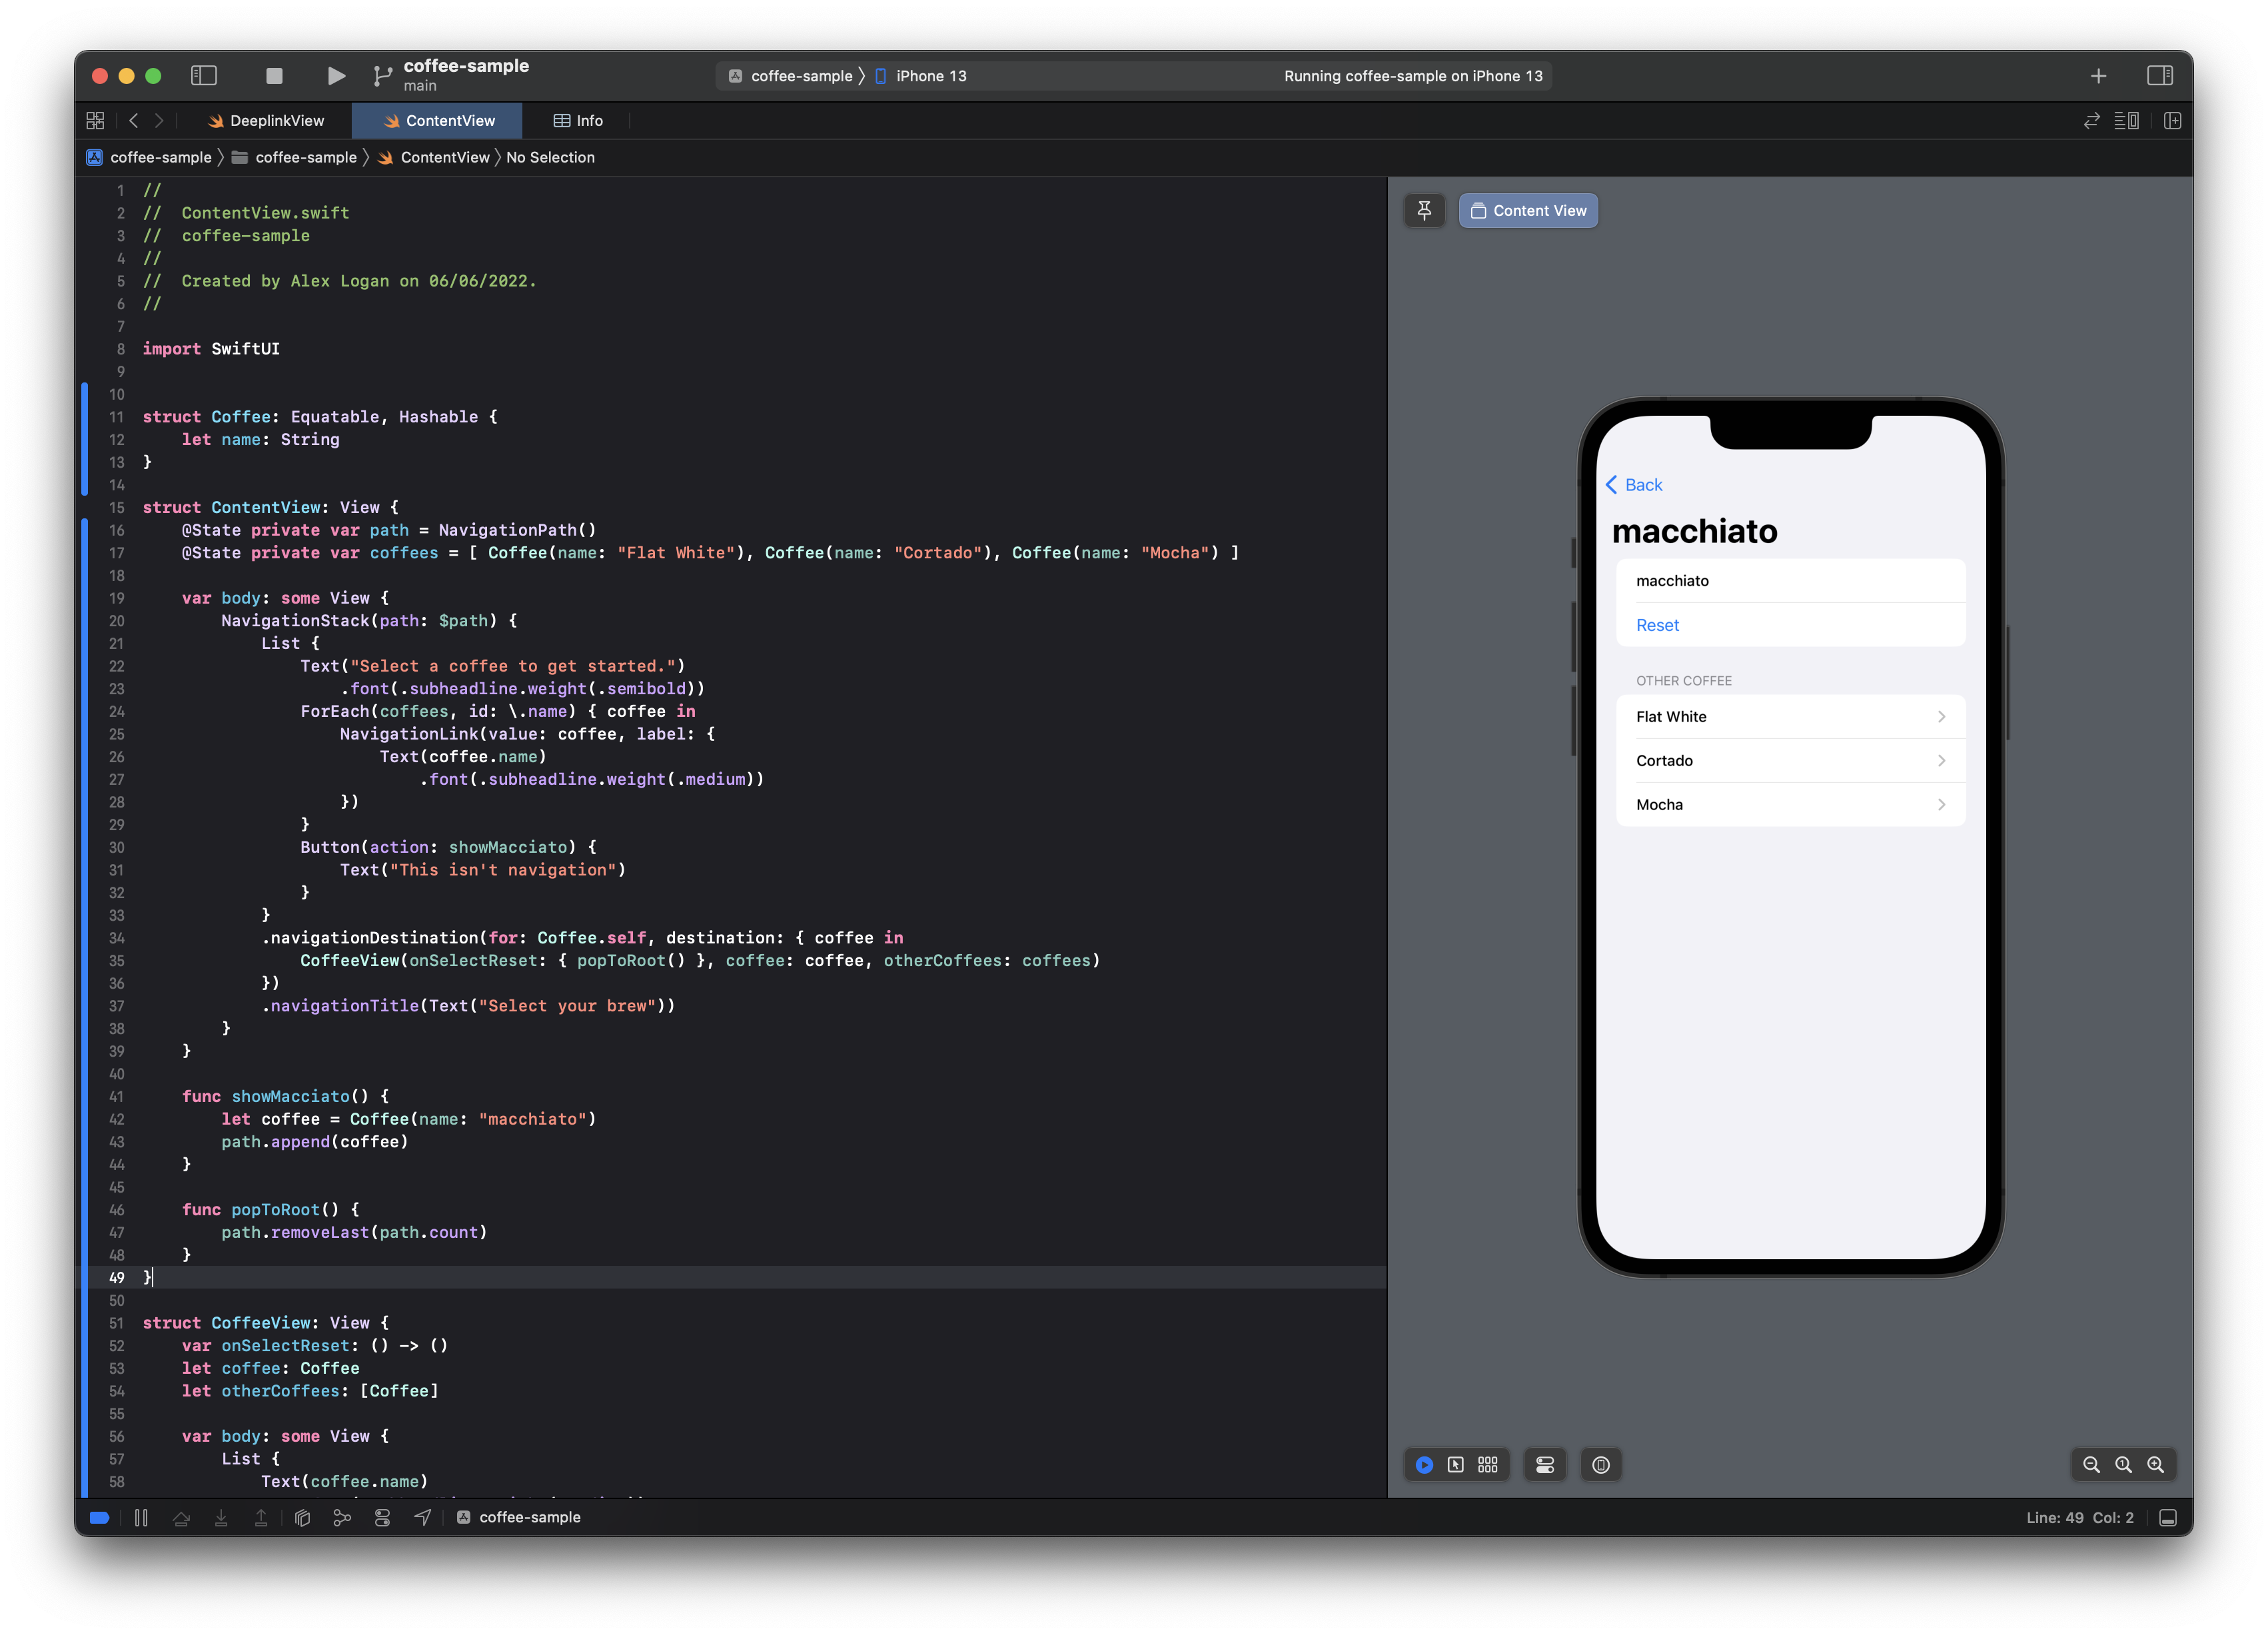
}The final one is really special, you can add whatever you want to the stack, path.append(Hashable).
When you call this method, the stack will push whatever you have as the navigationDestionation for that given hashable, allowing for you to push anything via code. This will enable really easy deeplinks.
struct ContentView: View {
    @State private var path = NavigationPath()
    @State private var coffees = [ Coffee(name: "Flat White"), Coffee(name: "Cortado"), Coffee(name: "Mocha") ]

    var body: some View {
        NavigationStack(path: $path) {
            List {
                Text("Select a coffee to get started.")
                    .font(.subheadline.weight(.semibold))
                ForEach(coffees, id: \.name) { coffee in
                    NavigationLink(value: coffee, label: {
                        Text(coffee.name)
                            .font(.subheadline.weight(.medium))
                    })
                }
                Button(action: showMacciato) {
                    Text("This isn't navigation")
                }
            }
            .navigationDestination(for: Coffee.self, destination: { coffee in
                CoffeeView(onSelectReset: { popToRoot() }, coffee: coffee, otherCoffees: coffees)
            })
            .navigationTitle(Text("Select your brew"))
        }
    }

    func showMacciato() {
        let coffee = Coffee(name: "macchiato")
        path.append(coffee)
    }

    func popToRoot() {
        path.removeLast(path.count)
    }
}
struct ContentView: View {
@State private var path = NavigationPath()
@State private var coffees = [ Coffee(name: "Flat White"), Coffee(name: "Cortado"), Coffee(name: "Mocha") ]
var body: some View {
NavigationStack(path: $path) {
List {
Text("Select a coffee to get started.")
.font(.subheadline.weight(.semibold))
ForEach(coffees, id: \.name) { coffee in
NavigationLink(value: coffee, label: {
Text(coffee.name)
.font(.subheadline.weight(.medium))
})
}
Button(action: showMacciato) {
Text("This isn't navigation")
}
}
.navigationDestination(for: Coffee.self, destination: { coffee in
CoffeeView(onSelectReset: { popToRoot() }, coffee: coffee, otherCoffees: coffees)
})
.navigationTitle(Text("Select your brew"))
}
}
func showMacciato() {
let coffee = Coffee(name: "macchiato")
path.append(coffee)
}
func popToRoot() {
path.removeLast(path.count)
}
}
Our button isnt actually a NavigationLink, but now we can give it the power to be one. We could apply this to any view, or any function, to push views anywhere.
Deeplinks
Lets take what we've learned so far, and use it to setup deeplinks.
We can re-use all of our code, including popToRoot, we'll only need to add onOpenUrl to be able to understand the URLs we're given, then append to our path like we did earlier.
struct DeeplinkView: View {
    @State var path = NavigationPath()
    @State private var coffees = [ Coffee(name: "Flat White"), Coffee(name: "Cortado"), Coffee(name: "Mocha") ]

    var body: some View {
        NavigationStack(path: $path) {
            List {
                Text("What would you like to drink?")

                Section(header: Text("Coffee"))  {
                    ForEach(coffees, id: \.name) { coffee in
                        NavigationLink(value: coffee, label: {
                            Text(coffee.name)
                        })
                    }
                }
            }
            .navigationDestination(for: Emoji.self) { moji in
                EmojiView(moji: moji)
                    .navigationTitle("Your Moji")
            }
            .navigationDestination(for: Coffee.self, destination: { coffee in
                CoffeeView(onSelectReset: { popToRoot() }, coffee: coffee, otherCoffees: coffees)
            })
            .navigationTitle(Text("Café Logan"))
        }
        .onOpenURL { url in
            let components = URLComponents(url: url, resolvingAgainstBaseURL: false)
            let queryItem = components?.queryItems?.first(where: { $0.name == "moji" })
            guard let emoji = queryItem?.value else { return }
            popToRoot()
            path.append(Emoji(moji: emoji))
        }
    }

    func popToRoot() {
        path.removeLast(path.count)
    }
}

struct DeeplinkView_Previews: PreviewProvider {
    static var previews: some View {
        DeeplinkView()
    }
}
struct DeeplinkView: View {
@State var path = NavigationPath()
@State private var coffees = [ Coffee(name: "Flat White"), Coffee(name: "Cortado"), Coffee(name: "Mocha") ]
var body: some View {
NavigationStack(path: $path) {
List {
Text("What would you like to drink?")
Section(header: Text("Coffee")) {
ForEach(coffees, id: \.name) { coffee in
NavigationLink(value: coffee, label: {
Text(coffee.name)
})
}
}
}
.navigationDestination(for: Emoji.self) { moji in
EmojiView(moji: moji)
.navigationTitle("Your Moji")
}
.navigationDestination(for: Coffee.self, destination: { coffee in
CoffeeView(onSelectReset: { popToRoot() }, coffee: coffee, otherCoffees: coffees)
})
.navigationTitle(Text("Café Logan"))
}
.onOpenURL { url in
let components = URLComponents(url: url, resolvingAgainstBaseURL: false)
let queryItem = components?.queryItems?.first(where: { $0.name == "moji" })
guard let emoji = queryItem?.value else { return }
popToRoot()
path.append(Emoji(moji: emoji))
}
}
func popToRoot() {
path.removeLast(path.count)
}
}
struct DeeplinkView_Previews: PreviewProvider {
static var previews: some View {
DeeplinkView()
}
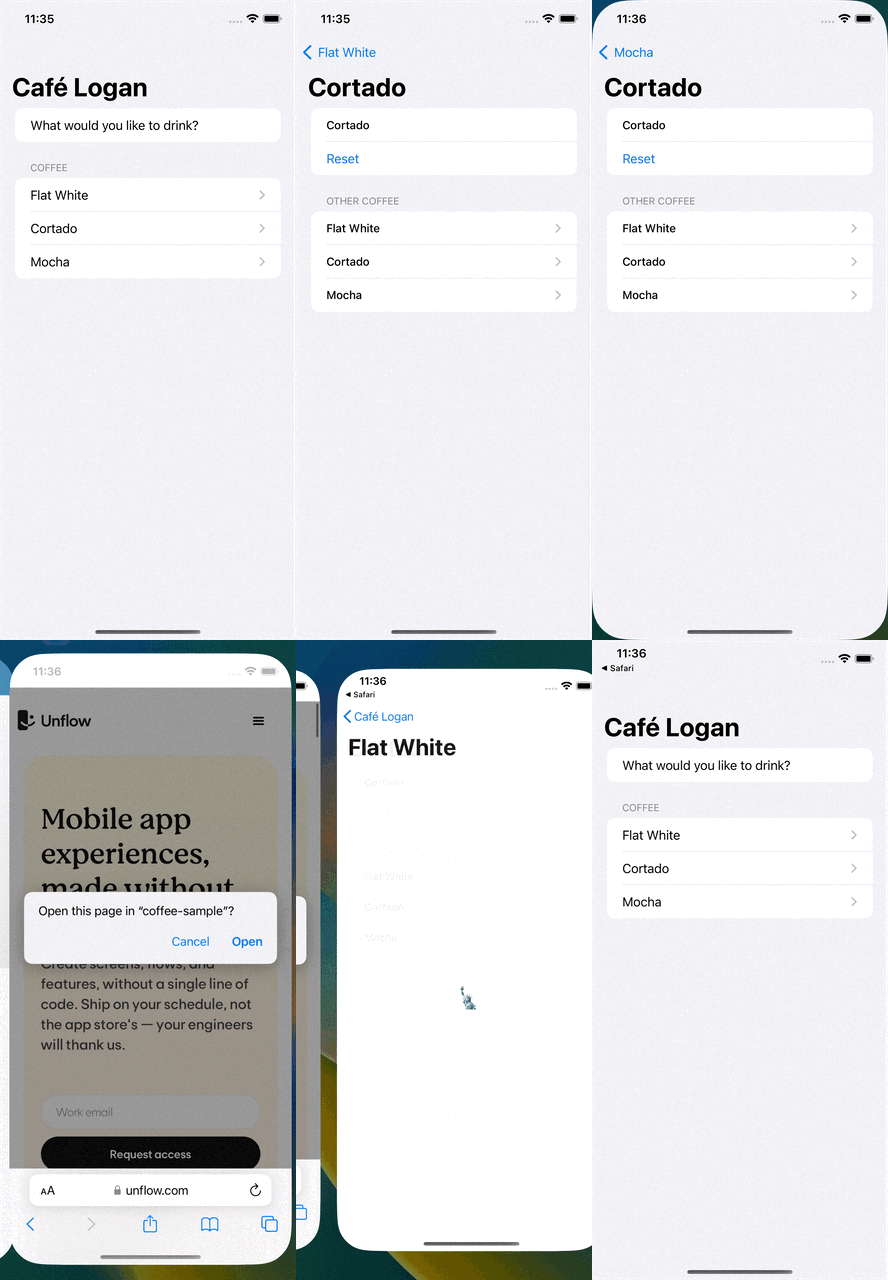
}You can see it in action here. Pretty powerful huh?

Thanks for reading! I hope you're just as excited as I am to get this into my apps. This has just been a really light touch look at the new API, but i'll keep looking at making content over this coming week, including more advanced navigation like the split views.
You can find my code on github.